Setting Up an IRC Bouncer
Even in 2018, when modern, feature rich instant messaging applications like Gitter or the extremely popular Slack, are as pervasive as ever, IRC remains the preferred method of communication for many developers. It’s simple, stable, ubiquitous, and most importantly, fully decentralised. It is an old protocol though, as IRC has been kicking about since the early nineties (the IRC protocol RFC was published in 1993). As such, IRC does come with its limitations.
One of the most notable for me is the lack of message archival. All messages sent from and received by an IRC client are not stored in your machine, nor you get a replay of the past conversations in a channel you just joined. Every time you log into an IRC chat room, you’re given a clean slate. This is inconvenient, given IRC is very often used as an out-of-band channel of communication. You join a channel, leave a question and then wait a few hours for someone to reply, as people don’t tend to monitor IRC as frequently as they would with other instant messaging applications.
Fortunately and perhaps not surprisingly, this has been a solved problem for quite some time now. The quickest and simplest method is to establish a permanent connection to the IRC server from a server under our control which is on 24/7 and establish a SSH/tmux session with it every time we want to check back on IRC. When we’re done, just detach the session with C-a d on GNU screen or C-b d on tmux. This solves the problem of missing all messages sent in a channel while we were away but that’s about all you get. If you’re looking for a solution that offer much more than this, it’s time to take a look at bouncers.
What is a bouncer server?
A bouncer server is a server we use as a proxy to access IRC. A bouncer will take our IRC details and establish a connection to an IRC server on our behalf and even join a list of predefined channels.
We then connect to this bouncer server from our IRC client instead of to the IRC server directly, and from this point on, our messages will be “bounced on” by the bouncer to the target server.
Bouncers offer several benefits including:
- Persistent server and channel sessions
- Logging channel conversations to a text file for archival
- Bouncer user authentication
- Automatic IRC server authentication via NickServ or SASL
- Automate IRC user statuses (leave & away messages, etc.)
- And much more!
Setting up the bouncer server on AWS
We’re going to set up our own Bouncer server using ZNC, the most popular bouncer server application, on an inexpensive AWS EC2 instance.
Launch a new Ubuntu Server 16.04 t2.nano EC2 instance with all the default settings except for the following:
- User data: install bouncer software (ZNC), create a user for the process and a directory for it to store its files and a systemd unit file to launch it at startup.
#!/bin/bash

apt-get update && apt-get dist-upgrade -y && \
apt-get install -y znc znc-dev znc-perl znc-python znc-tcl && \
useradd -M -s /bin/false znc && usermod -L znc && \
mkdir /opt/znc && \
cat > /etc/systemd/system/znc.service <<- EOF
[Unit]
Description=ZNC IRC Bouncer

[Service]
ExecStart=/usr/bin/znc -d /opt/znc
ExecReload=/bin/kill -HUP $MAINPID
KillMode=process
Restart=always
Type=forking
User=znc

[Install]
WantedBy=multi-user.target
Alias=znc.service
EOF
Since the systemd unit file has been placed directly in /etc/systemd/system, it will be automatically run at startup. There’s no need to enable it.
- Subnet: ensure the instance is launched in a public subnet with an Internet Gateway attached, so it’s readily accessible from the Internet.
- EBS volume: your ZNC (Bouncer) password, IRC server password and IRC conversation logs will be stored in plaintext files so I strongly recommend you encrypt the volume.
- Create a new security group to attach to it so the following ports are open:
- SSH: so we can configure the instance
- TCP port 7078 (any unreserved port will do, actually): ZNC listening port
- Set its “Name” tag to something meaningful, if you wish
Now generate a new Elastic IP address and associate it to the instance.
Installing ZNC
SSH into your newly created EC2 instance and run the ZNC first time setup process, which will ask us to set a listening port for the bouncer and to create an admin account. Select the options as below.
$ znc --makeconf

[ .. ] Checking for list of available modules...
[ ** ]
[ ** ] -- Global settings --
[ ** ]
[ ?? ] Listen on port (1025 to 65534): 7078
[ ?? ] Listen using SSL (yes/no) [no]: yes
[ .. ] Verifying the listener...
[ ** ] Unable to locate pem file: [/znc-data/znc.pem], creating it
[ .. ] Writing Pem file [/znc-data/znc.pem]...
[ ** ] Enabled global modules [webadmin]
[ ** ]
[ ** ] -- Admin user settings --
[ ** ]
[ ?? ] Username (alphanumeric): admin
[ ?? ] Enter password:
[ ?? ] Confirm password:
[ ?? ] Nick [admin]:
[ ?? ] Alternate nick [admin_]:
[ ?? ] Ident [admin]:
[ ?? ] Real name (optional):
[ ?? ] Bind host (optional):
[ ** ] Enabled user modules [chansaver, controlpanel]
[ ** ]
[ ?? ] Set up a network? (yes/no) [yes]: no
[ ** ]
[ .. ] Writing config [/znc-data/configs/znc.conf]...
[ ** ]
[ ** ] To connect to this ZNC you need to connect to it as your IRC server
[ ** ] using the port that you supplied.  You have to supply your login info
[ ** ] as the IRC server password like this: user/network:pass.
[ ** ]
[ ** ] Try something like this in your IRC client...
[ ** ] /server <znc_server_ip> +7078 admin:<pass>
[ ** ]
[ ** ] To manage settings, users and networks, point your web browser to
[ ** ] https://<znc_server_ip>:7078/
[ ** ]
[ ?? ] Launch ZNC now? (yes/no) [yes]: no
This will generate a config file which will be stored in the home directory for the user we ssh’d in as (ubuntu if you’re using the default Amazon-provided Ubuntu Server AMI). Let’s move the newly created config files from this directory to /opt/znc and give the znc user owner rights to it.
$ sudo mv ~/.znc/* /opt/znc
$ rmdir ~/.znc
$ sudo chown -R znc:znc /opt/znc
Now you can start ZNC
$ sudo systemctl start znc
Ensure ZNC has started successfully
$ systemctl status znc
● znc.service - ZNC IRC Bouncer
   Loaded: loaded (/etc/systemd/system/znc.service; enabled; vendor preset: enabled)
   Active: active (running) since Sun 2018-07-29 13:02:07 UTC; 21min ago
  Process: 1181 ExecStart=/usr/bin/znc -d /opt/znc (code=exited, status=0/SUCCESS)
 Main PID: 1245 (znc)
    Tasks: 1
   Memory: 10.8M
      CPU: 54ms
   CGroup: /system.slice/znc.service
           └─1245 /usr/bin/znc -d /opt/znc
Configuring ZNC
The first configuration stage is complete. Now we need to add the user that we will sign in as and an IRC network to associate to that user.
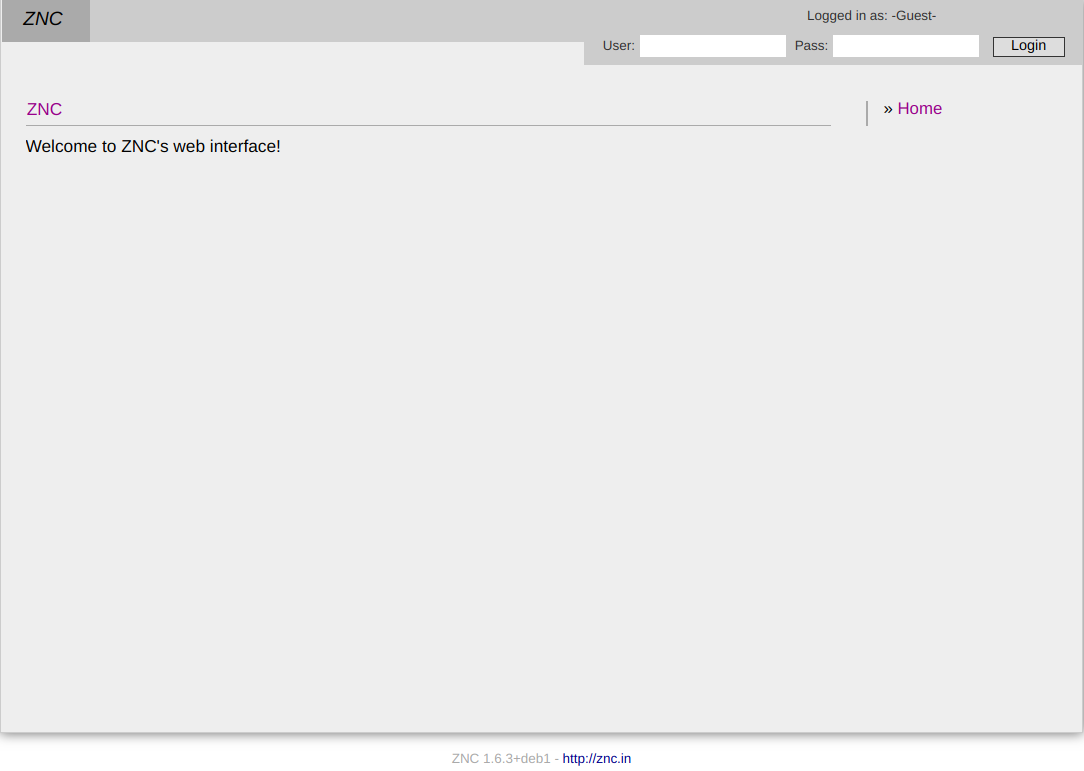
To apply the remaining settings to the bouncer, we will connect to its web configuration frontend, available on the port we configured it to listen on (in my case, port 7078). So in your browser, enter the following URL: https://<bouncer_ip_address>:7078. If you get a “missing HTTPS certificate” error or similar, you can safely ignore this and instruct your browser to continue. Now log in as the admin user you created before, using the password you entered.
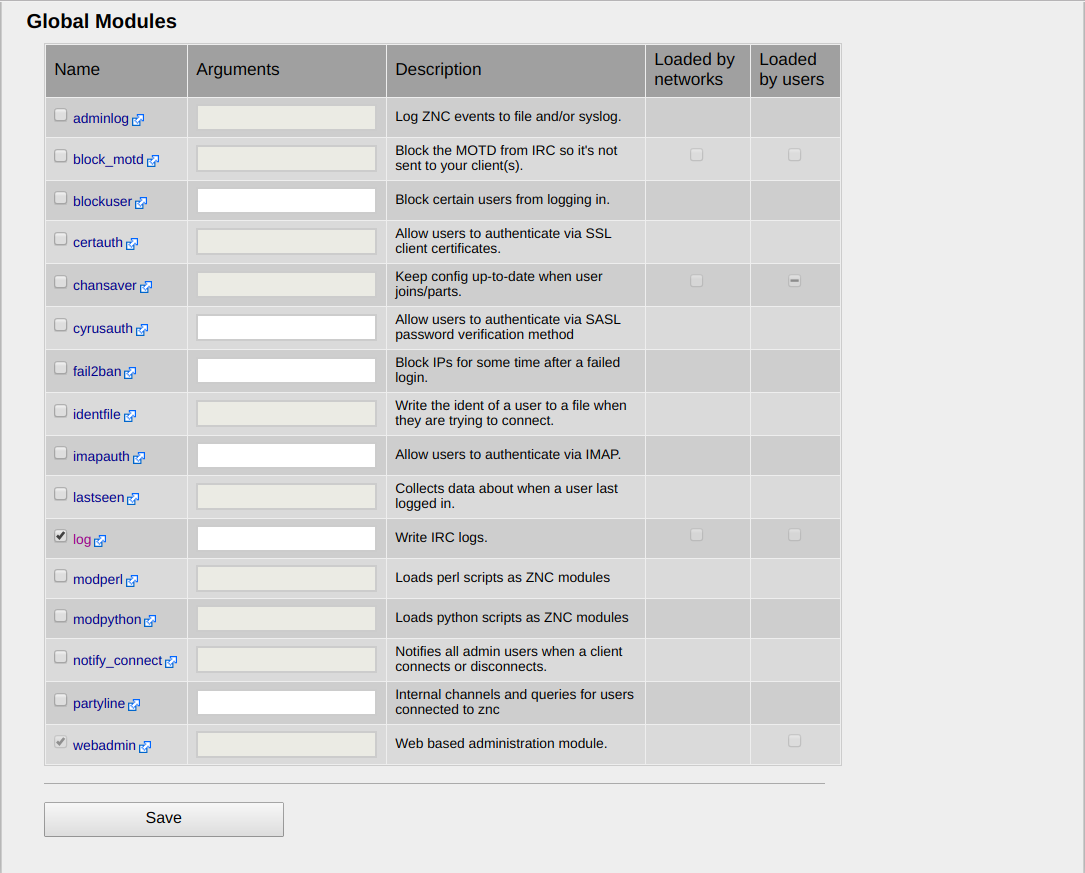
Once you log in, you can click on the “Global Settings” menu entry on the right-hand side to have a look at the overall configuration of the bouncer.
ZNC installs a collection of modules (shared objects) in /usr/lib/znc that you can load or unload while the daemon is running. If you scroll down to the bottom you’ll see a list of the global modules that affect the operation of the bouncer, which you can enable/disable by toggling the checkboxes in the “Name” column. In my case, I have “log” enabled as I want my bouncer to store in a text file all of the messages sent in the channels I’m a member of.
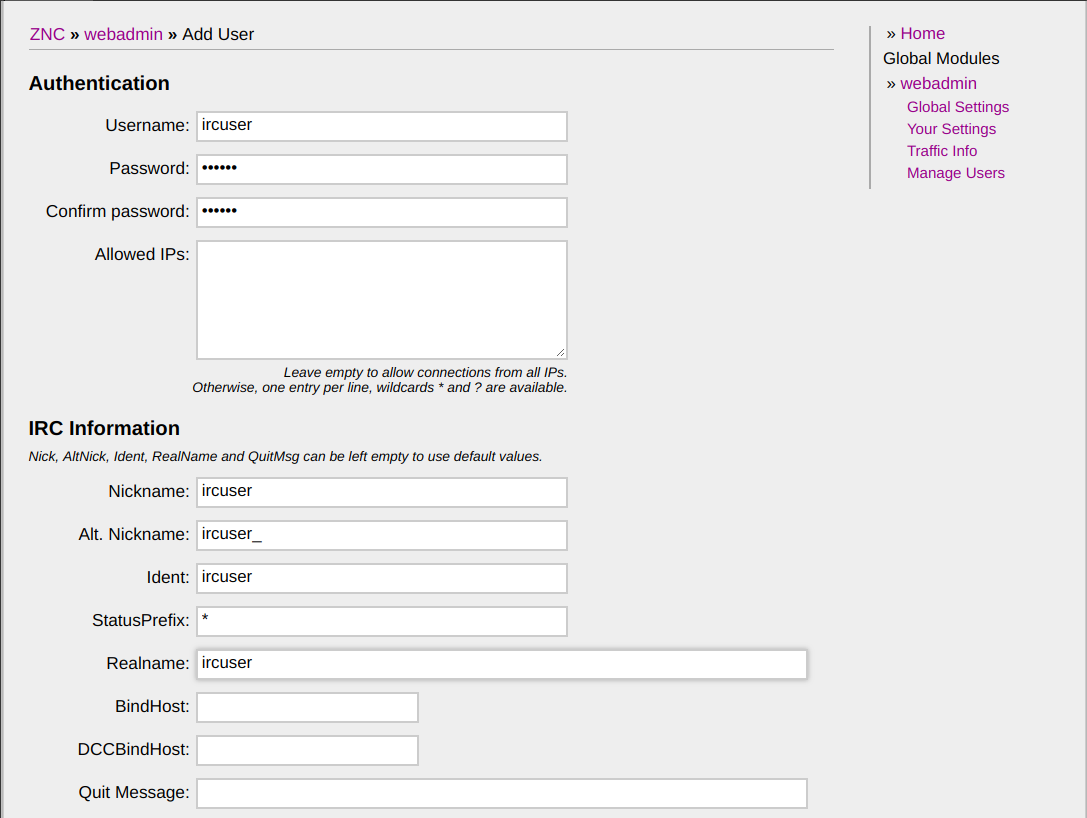
Click on “Manage Users” on the right menu to bring up the user configuration panel. Now click on “Add” to add a new user and fill in the details: username, password (note this password will only be used to authenticate yourself with ZNC, it will not be used with the IRC server), IRC details and a list of modules that you may want to load for this user specifically.
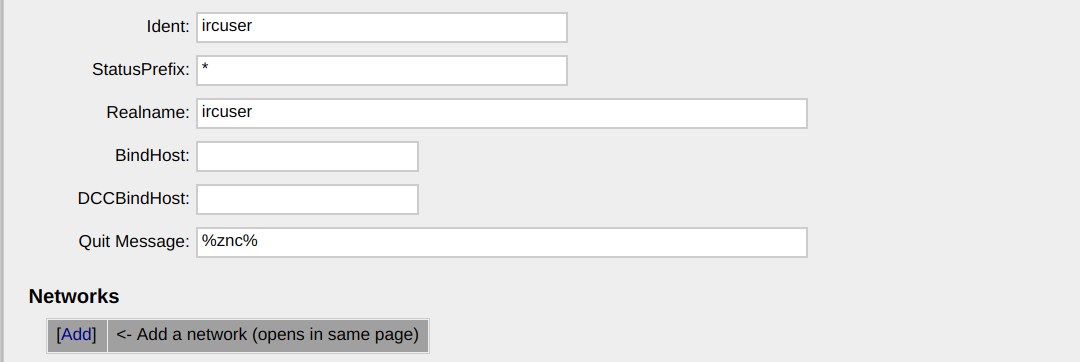
Then click on “Save and continue” at the bottom so that we can add an IRC network for this user.
Fill in the details for the IRC network this user will be associated with and optionally enable any modules that you want to load automatically when connecting to this network. One such module could be sasl if you wish to authenticate using this method with the IRC server. I will be enabling this module on this network.
In the “Servers of this IRC network” text box you’ll enter the information of the IRC server you want to connect to in the format
<server> [+]<port> <irc_password>
Append a plus sign to the port to denote an SSL connection. <irc_password> is the password you used to register to the IRC server via the /NickServ command, which is completely separate from the password you set to authenticate to the bouncer itself above.
For example, to connect to the Freenode IRC network via SSL with a previously registered account, the contents of this text box would be
irc.freenode.net +6697 myNickServPassword123
Otherwise, it could simply be
irc.freenode.net 6667
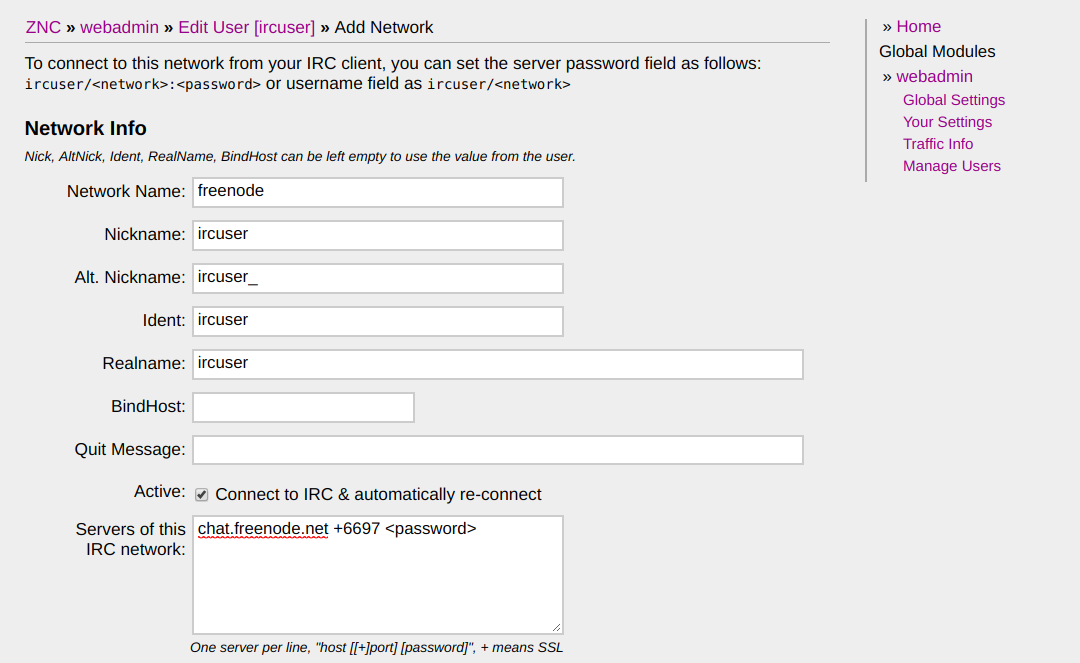
You’ll notice your IRC password is stored in plaintext in the server. This is why I recommended during the VPS setup steps to encrypt your EBS volume and naturally, have very tight control on who can access your bouncer server. Locking down the VPS security group to only allow incoming connections from a very small subset of IPs is recommended.
Click on “Save and continue” again. You can now optionally add a list of channels you want the bouncer to log you into but it will also remember those you join yourself when you connect to it.
We now have an AWS VPS (Virtual Private Server) hosting a fully functional installation of ZNC. The last thing to do is to point our IRC client at the bouncer.
Connecting to the bouncer
I am going to be using irssi to connect to the bouncer. Here are the steps I followed to get it working. Your mileage may vary on a different client like HexChat or mIRC but the details themselves should remain mostly the same.
Launch irssi specifying the nickname to use to connect to the bouncer
$ irssi -n <username>
Create a new network called freenodebnc and add the bouncer details to it. Since I’m connecting to the Freenode IRC server over SSL, I’m using the port it exposes for secure connections, 6697 and passing the -ssl flag in. username/freenode is the username and network combination that we created on the ZNC user config panel. password is the password we use to authenticate with ZNC, not to the IRC server.
/network add freenodebnc
/server add -net freenodebnc -auto -ssl <bouncer_ip> 6697 username/freenode:password
Run the following commands to save these changes to the irssi config file and connect to the bouncer.
/save
/connect freenodebnc
If you loaded the SASL module (you can check if it’s loaded by running /msg *status ListModules), you need to configure it at this point. So, once you’re connected to the bouncer, run the following commands on your IRC client.
/query *sasl
mechanism external plain
set <NickServName> <password>
Where NickServName is your registered username with the IRC server and password the password you use to authenticate to the aforementioned server.
Now reconnect to the IRC network with the reconfigured SASL module.
/msg *status jump
It may take a few moments for the bouncer to establish the connection (especially if you’re connecting over SSL and using authentication mechanisms such as SASL) but after this, you will obtain a permanent, secure session with the IRC server which you’re free to pause and resume whenever you want. Happy chatting!