I Tried to Install Gentoo and Survived
Freedom of choice lies at the core of all that Linux strives to achieve. This is both its greatest virtue and its most overwhelming trait.
Since I first got into Linux, I have installed and used many different distributions. Some, like Ubuntu, place ease of use at the forefront of their design, and it shows; others, like Arch, empower the user to the nth degree, allowing him or her to build their own environment from the bottom to the top, and it shows… Gentoo would doubtless fall into the latter category. In this article I will share a first-hand account of how I found out.
The idea to try out Gentoo was born out of mere curiosity, as it typically happens. I first tried installing it maybe a year or two ago, and failed miserably. Since then, it became a self-imposed milestone of mine: a test of fire of sorts. Recently I decided it was time to try my luck again. I want to talk about that.
When you set out to install a brand-new Linux distro (or any other OS image for that matter), the very first step is to download an image. Now, I’ll be honest, I was somewhat confused by the plethora of images the Gentoo repositories host for you to download: minimal, hardened, multilib, nomultilib, systemd, stage3, stage4… Both in current and latest release flavours and compiled for a dozen CPU architectures. You can bet that’s a handful. However, thanks to the excellent Gentoo handbook, this jungle of ISOs became much clearer. Basically put, you want to get the minimal installation ISO first, and then you’ll go from there. Hardened versions are more secure flavours of gentoo. multilib images you need when you want to install a 64-bit system compatible with 32-bit binaries; nomultilib will give you a pure 64-bit install, which is not recommended, as many packages or libraries will fail to install since they’re compiled for 32-bit architectures still.
I downloaded the minimal installation ISO, which is little more than a LiveCD to bootstrap to the actual installation, and whacked it into a VirtualBox instance. After booting into it, I was greeted by a couple of grinning Tux penguins whilst the loader prepared everything. I was soon prompted to select the Gentoo kernel to use during the installation. You can choose between a regular kernel, one with no framebuffer support (if you have no plans to leave the terminal, I suppose) and the typical memtest that ships with most Linux LiveCDs. Once you select a kernel, the LiveCD will read all of its files into a tmpfs mounted onto your RAM and it will drop you into a terminal when it’s done. Right. Having performed an Arch Linux installation before, this did not scare me. Armed with the wisdom of the Gentoo handbook, I started making my journey.
The first few steps went as usual. I delineated the partition table and installed Btrfs in the root partition to spice things up and then proceeded to download the files necessary to install the base sytem. This is what the famous stage3 tarballs are made for. Put simply and with the understanding of a beginner, stageX tarballs are collections of files required to install the fundamental components that make up any Gentoo system. There are 4 stages: stage1 and 2 archives are meant for Gentoo developers only so end-users are better off ignoring them. stage3 is the most widely used, as it will provide you with almost everything you need to boot into a usable Gentoo, with the exception of the kernel and the bootloader, which need to be downloaded and configured separately. I’m not too sure what stage4 tarballs provide, but it looks they’re tailored for container/cloud installations.
Downloading a stage3 tarball is largely equivalent to running pacstrap on an Arch Linux installation: it will pull in the contents of the root directory, binutils, gcc, etc. This takes a while. With Gentoo, the process is a bit more interesting though, since the tarball is not retrieved via a dedicated command but as a regular file. Being in a minimal LiveCD with no GUI browser installed, you’ll have to retrieve the tarball old-school style. You can do it in several manners: HTTP/FTP with links (a terminal browser installed in the LiveCD) or curl/wget or using rsync, as I did. Not rocket science, granted, but I found it peculiar.
Once I downloaded and installed the tarball into my Btrfs root filesystem -nothing special about that, I promise-, I had a filesystem tree built in /mnt/gentoo ready to be chroot’ed into. Then it was time to turn to one of the aspects for which Gentoo is mostly known. But before that, I need to tell you about one of the biggest distinctive features of Gentoo: portage, its package installation mechanism. If Linux is the heart of Gentoo, portage is its soul, what gives it its unique appeal. Portage’s main goal is to fetch, install, update and manage software in your computer in an orderly manner, just like any other of its Linux brethrens. However, portage distances itself from them in one thing: it doesn’t fetch binaries from the repositories, but only sources. Once it’s acquired them, it will configure and build them for your specific system configuration, using global GCC flags you define. This makes portage much more similar to the venerable ports system BSD Unix than to the traditional Linux package software (with the exception of Slackware). The advantage of compiling all the software you install in your machine is that you have a great amount of control over the specific features you want installed: using USE flags, you can fine-tune the level of support you want to obtain from your packages. Do you want a full Qt-based system? Tell Portage with a USE flag and your build won’t be contaminated in the slightest by GTK. Want to install vim but prefer certain features turned off or maybe wish to build some experimental traits into it? This is doable in any Linux system, sure. However, building from source is Portage’s native way of installing software, therefore it has no problem managing software installed in this way.
Don’t be put off by the compilation flags step though; in reality it’s uncomplicated as long as you’re aiming for a standard installation. Bear in mind though that Gentoo is often chosen precisely because some people don’t want their experience to be standard, and in that, it excels. Portage exposes its package-managing functionaility with emerge. Emerge is the application you’ll invoke to install, uninstall or update your software packages in Gentoo.
Now, setting up the global GCC flags is done in a handful of files like /etc/portage/make.conf and package.use. In them you define things like the degree of compiler optimisations, included libraries, make invocation commands, etc.
With that out of the way, I proceeded to install the single most important component of any functional operating system: the kernel. In Gentoo, downloading the kernel is done by acquiring its sources via emerge
# emerge sys-kernel/gentoo-sources
It will be downloaded to /usr/src/. From this location, I configured and compiled the Gentoo Linux kernel. This is without a doubt the single most important step of the installation process and is one which a priori seems daunting. Enable or disable support for a myriad of drivers for devices you have never heard of, filesystems that you don’t even know how to pronounce, kernel paging, multithreading flags, and a lot more. Should they be built right into the kernel or rather loaded as modules? What compilation flags do I need to define? God almighty, this is too much! Quite the opposite. Attention and patience is all that’s needed to successfully configure, compile and install a working Linux kernel. In fact, I cover this topic in some detail here. If you want to attempt a Gentoo installation, checking it out first might help you demistify the process a bit. In a nutshell, unless you have some very specific “dietary requirements”, the configuration task is very painless and doesn’t require a profound understanding of the kernel internals. Just make sure you tick off device driver support for all the components installed in your system (you can find out what hardware components your system has by running lspci). The kernel config file already contains very sane defaults and will already build in support for the most common hardware so, again, don’t get too stressed.
Once we’ve tailored the Kconfig file (the kernel configuration file) to my liking, I proceeded to build and install the kernel in the /boot partition.
# make && make modules_install
# make install
Next thing in the list was the initramfs file. Gentoo allows you to create one pretty easily thanks to its genkernel tool, which incidentally, can also take care of the entire kernel installation process for you. But where is the fun in that?
# genkernel --install initramfs
This will invoke mkinitcpio for us and generate the initramfs file, placing it in our /boot directory for the bootloader to find, along with the kernel executable. Now, on to the last step to a bootable OS: the bootloader.
My first attempt at installing a bootloader was naturally grub. However, every time I rebooted I would be presented with the following funky error screen:

If anybody knows why this happens please let me know. All I can guess is that grub doesn’t get along very well with the virtual video hardware provided by VirtualBox and thus is erroring out. I tried several different grub.conf settings (nomodeset, forcing the video resolution, etc.) to no avail. I even recompiled the kernel a couple of times with different configurations. Nada. Since I was sure the problem lay in grub, I decided to install LILO and things worked out just fine. Normally I wouldn’t recommend doing this, since LILO is quite outdated and doesn’t offer all the features GRUB does, but given all I wanted was a bare minimum workable installation, it certainly did the job.
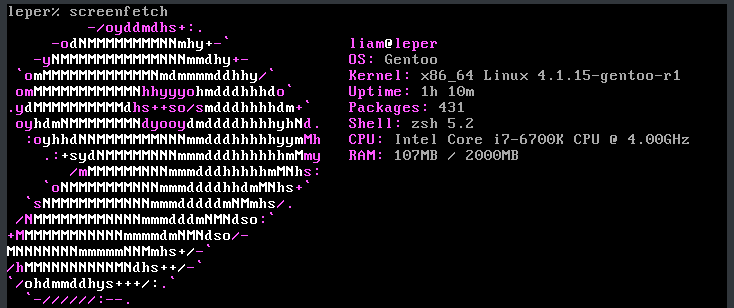
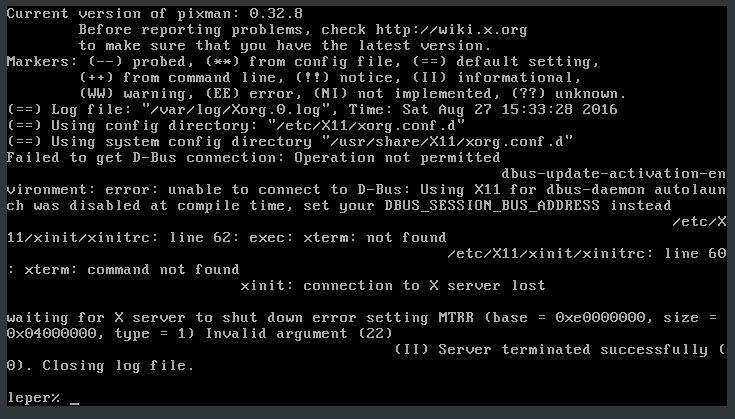
All that was left was to blaze through the basic network settings (hostname, hosts file…), install sudo, vim and other indispensable packages, and reboot. After that, just to round up the experience, I installed X and i3 (this took an hour or two) so I could show it off in this post. However, I’m having some trouble getting them to run, so I’ll have to settle for this consolation screenfetch for the time being.

Also, I decided to install systemd instead of OpenRC because I’m more familiar with it, but now certain things like localectl don’t work at all. Maybe some day…

Initial Verdict
I have barely scratched the tip of the iceberg of what Gentoo can do. I don’t even question that. I am 100% positive Gentoo is capable of doing but I found that the level of involvement and finesse required to pull off a flawless Gentoo installation is more than I need, even compared to Arch Linux, my favourite DIY distro, which I’ve been using for a year day in day out on my laptop. There’s another popular Gentoo spin-off circling around called Funtoo. I will check it out some day and share my thoughts if I think it offers something Gentoo doesn’t.
P.S. You will have noticed I’ve glossed over a lot of details here. My intention with this article was not to provide a step-by-step guide to installing Gentoo but rather a casual account of my own experience. If this article has piqued your interest enough to convince you to try out Gentoo, just head straight here. Happy hacking! (You’ll get a lot of that)